Sunday, November 18, 2012

Painted Horizontal Stripes

The Bonus Room

     In the last 10 hours I have accomplished a lot here at the Smock household.  When I rolled out of bed at 9:30 this morning (woo hoo for sleeping in on a Sunday!) I immediately started painting.  I've been putting this particular project off for a couple of weeks now.  Honestly I've been working on something else that I'm sort of burnt out on.  *Hint*


Upstairs in our house we have 3 bedrooms.  The big room which we gave to Taylor and her gobs of toys, the tiny spare room who's use has yet to be determined-I haven't started a thing in there, and the middle sized room which is ours.  We also have a really awesome bonus room.  When you walk up there is a large space that holds the entrance to each bedroom as well as the attic door.  This is what it looked like this morning.  Can you tell we're still living out of boxes?

We painted the whole room white before moving in.  The wall on the right by the lamp had huge brown hand painted tree. 


This wall had a white picket fence painted all the way across it-no joke.  It took layers of paint to cover.  Not to mention the entire room was pastel yellow.  It looked like an illustration from Winnie the Pooh. 
Thus far it has been a dropping ground, a catch all if you will.  I LOVE the curtains in there, we just purchased them from JC Penny a couple of weeks ago. They had a 30% off clearance sale we just couldn't pass up.  It looks pretty dreary but I assure you there is lots of light!

I've been all over the horizontal stripes lately.  So clean, but still interesting.  Originally I was going to paint myself some super sweet striped drop cloth curtains for this room but after being here a month, I couldn't take not having anything on the windows at night. We also have a daunting list of projects that would have inevitably come first anyways.  Plus we hadn't used any of our gift cards from the wedding/bridal showers yet.

So, I set out on a mission to get my stripes but in a much bigger way.  On the walls!  The older I get the  more brave I am when it comes to paint.  I have to admit I have pulled off some pretty sweet paint jobs.

First, you tape. I had my husband borrow a laser level from his dad and got to work. 
                        Our walls were 79" ceiling to top of trim.  I read a tutorial on stripes a while back that said if you have an odd number always make your bottom stripe the odd one because the eye doesn't typically draw to the floor.  You won't even notice. 
With darn near 80" to work with I thought 10 inch stripes would be the perfect size.  That gave me 8, plus our 6 inch trim on the bottom.  Needless to say, my bottom stripe is only 9", but you really cannot tell. 
Finally finished taping and you can tell its very near dark outside.  You probably notice that the tape is not even.  *This is important!*  If you want the stripes to be the same size you have to off set your tape. 
On the left you can see i marked in orange where the 10" increments fall.  On the stripes that you will be painting on (marked with an "x" on the left) you have to tape above your mark on the top and below your mark on the bottom.  Then you will skip a stripe and repeat.  This results in the parts you will not be painting having tape that is closer together.  You see the tape above and below the marks well on the left above. 


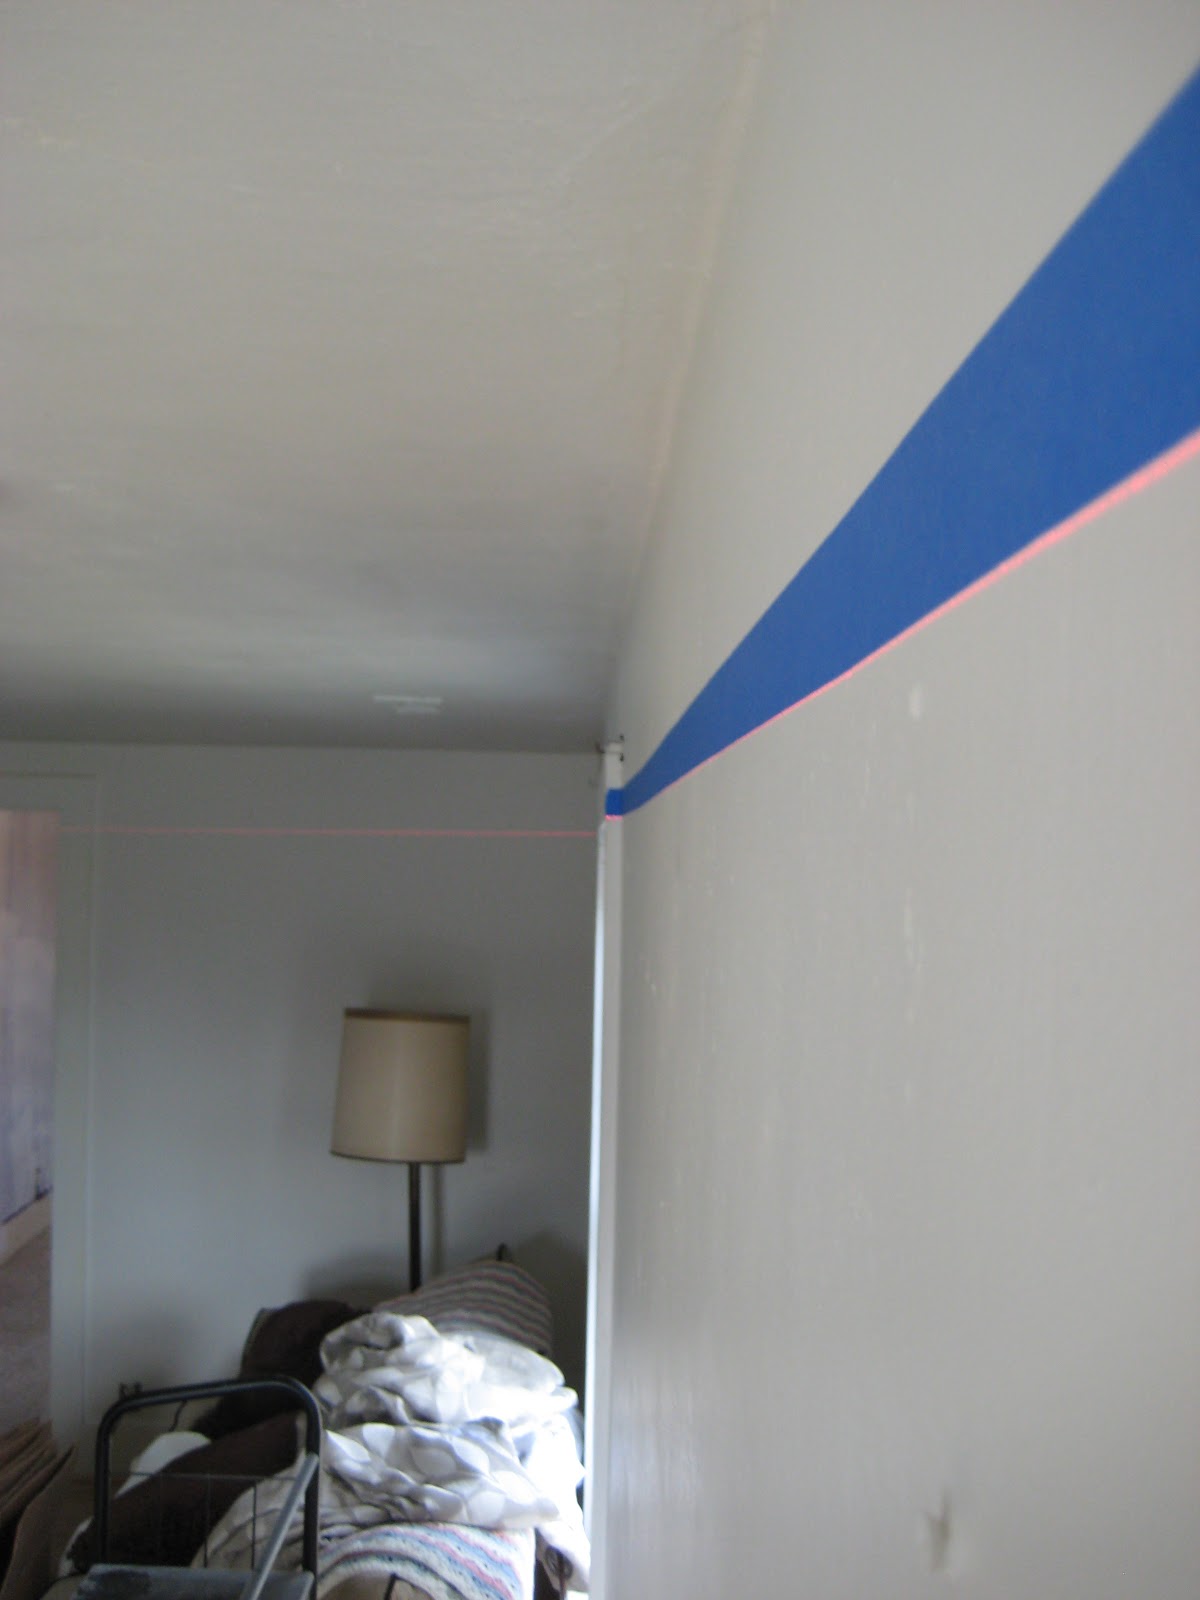
Time to paint.  I picked this color.  It looks sorta like butter but it definitely dries more of a khaki color.  Its called Homespun Linen. 

I used a small sponge roller for this project because I wanted to be able to paint fast with more control.  A big roller would have been hard to keep in the lines.  These small rollers offer great coverage.  I was done in 2 coats, and they squeeze nicely into cracks so there's no need for brush work. 

                                                I hope you like the finished product!


Now, it is really dark outside.  Maybe I'll take some photos tomorrow when its light to show you all how stunning it really is. 

As stated in my last post, I'm well aware of the collection of dust.  After 10 hours of straight project, I'm going to sit down with my hunny and tune in for some Walking Dead.  The mop will just have to wait for me. 

On a side note, I did leave ONE wall a blank slate.

That's right, future FEATURE WALL!  I am chewing at the bit to start this one for sure :)

Friday, November 16, 2012

Hand Painted Wood Floor

The Sanctuary

Hi friends!  Im so excited to start a blog I could squeal...seriously.  My husband Evan and I got married this June and are so happy to be officially moved into our first home.  I have a 5 yr old daughter Taylor and we also recently added a new member to the family...
                                                                          
                                                           Lily

Isn't she SOOOO cute?  We think so too.

Now down to business.  For my first blog post im going to show you the changes we've made in our new homes sanctuary (aka-the bedroom). 

When we moved in it looked like this:


Yes, that is maroon and tan (very filthy tan) paint and green carpet.  It also had this terrible green and maroon and gold wallpaper boarder.  Clearly it was the first thing to go since you dont see it in the above photos!


After I pulled up the carpet I found very dirty, worn and staple infested plank wood flooring.  Not the kind of flooring you can refinish, the old sub-floor kind.  Thankfully my wonderful friend Becky helped me pull out each and every one.  We were blessed to have her little girl Nevaeh there to help supervise.   It was painted with layers of green, orange, brown and white paint.


I set out to make it look beautiful and well, more me.  (oops I mean US!)  I loved the color we had in our apartment and I already had all of the accessories to match as well as a chair I recently reupholstered so paint was easy.  The color is called Turquoise Jewel.  Since I'm all about deals I purchased some white paint off of craigslist for $3 a gallon.  Since our local Menards does color tinting for free I marched in there to have mine mixed. 

To my surprise you cant just mix ANY color from a gallon of ANY white paint.  We had to improvise a little bit and the poor young man behind the counter ended up pulling fist fulls of paint out before mixing to *hopefully* get the right color, or at least one close.  It took some adding, and some subtracting of paint but after 3 tries we got one I was happy with.  Needless to say this is definitely a custom color that cannot be re-created.  He was sure to tell me my 1 gallon was all I was going to have.  Thankfully it was enough. 

A few weeks before we moved I found this great photo on pinterest and knew right away I would use it on the floor. 

I found a great post a couple days before I started from Brooke at All Things Thrifty.  The woman is a goddess, I swear.  I have learned volumes from her. 

I knew I didn't want such a large pattern on our floor and since our wood wasnt beautiful like it is in the inspiration photo I painted it all brown first.  I used Dutchboy porch and floor paint in Cocoa Bean and the same floor paint in white for the stripes. 

I didnt take photos of the process (boo-I forgot) but basically I just made a simple template out of .99 cent foam board.  I put two coats of my rich brown paint on the floor then I traced the pattern over and over with white crayon.   I went back with a small craft brush and hand painted the pattern on the floor.  I had some help from my friend Jill with this very, very TEDIOUS task. 
                                                           whoo-la!
We absolutely love it.  The we got our furniture moved in.  *Notice my beautiful chair?*  Furniture post, I promise!


 I should really invest in a better camera, or some photography classes.  It might help if the floor was actually clean.  We tore out plaster and lathe down stairs and it was fu not fun.  The dust is EVERYWHERE and I cant rid our house of it.  I was told before we started that I would be cleaning up dust daily for the next 6 months.  True story. 
Thanks for joining me, it's been swell!