Showing posts with label painted floor. Show all posts

Thursday, January 31, 2013

DIY Vinyl Floor Stencil

Today I have a fun new project to share with everyone.  I got this pretty lil thing done last weekend but I had a couple spots to touch up.  Between a sick kid and snow days it took me a while to get around to the last (and easiest) step. 

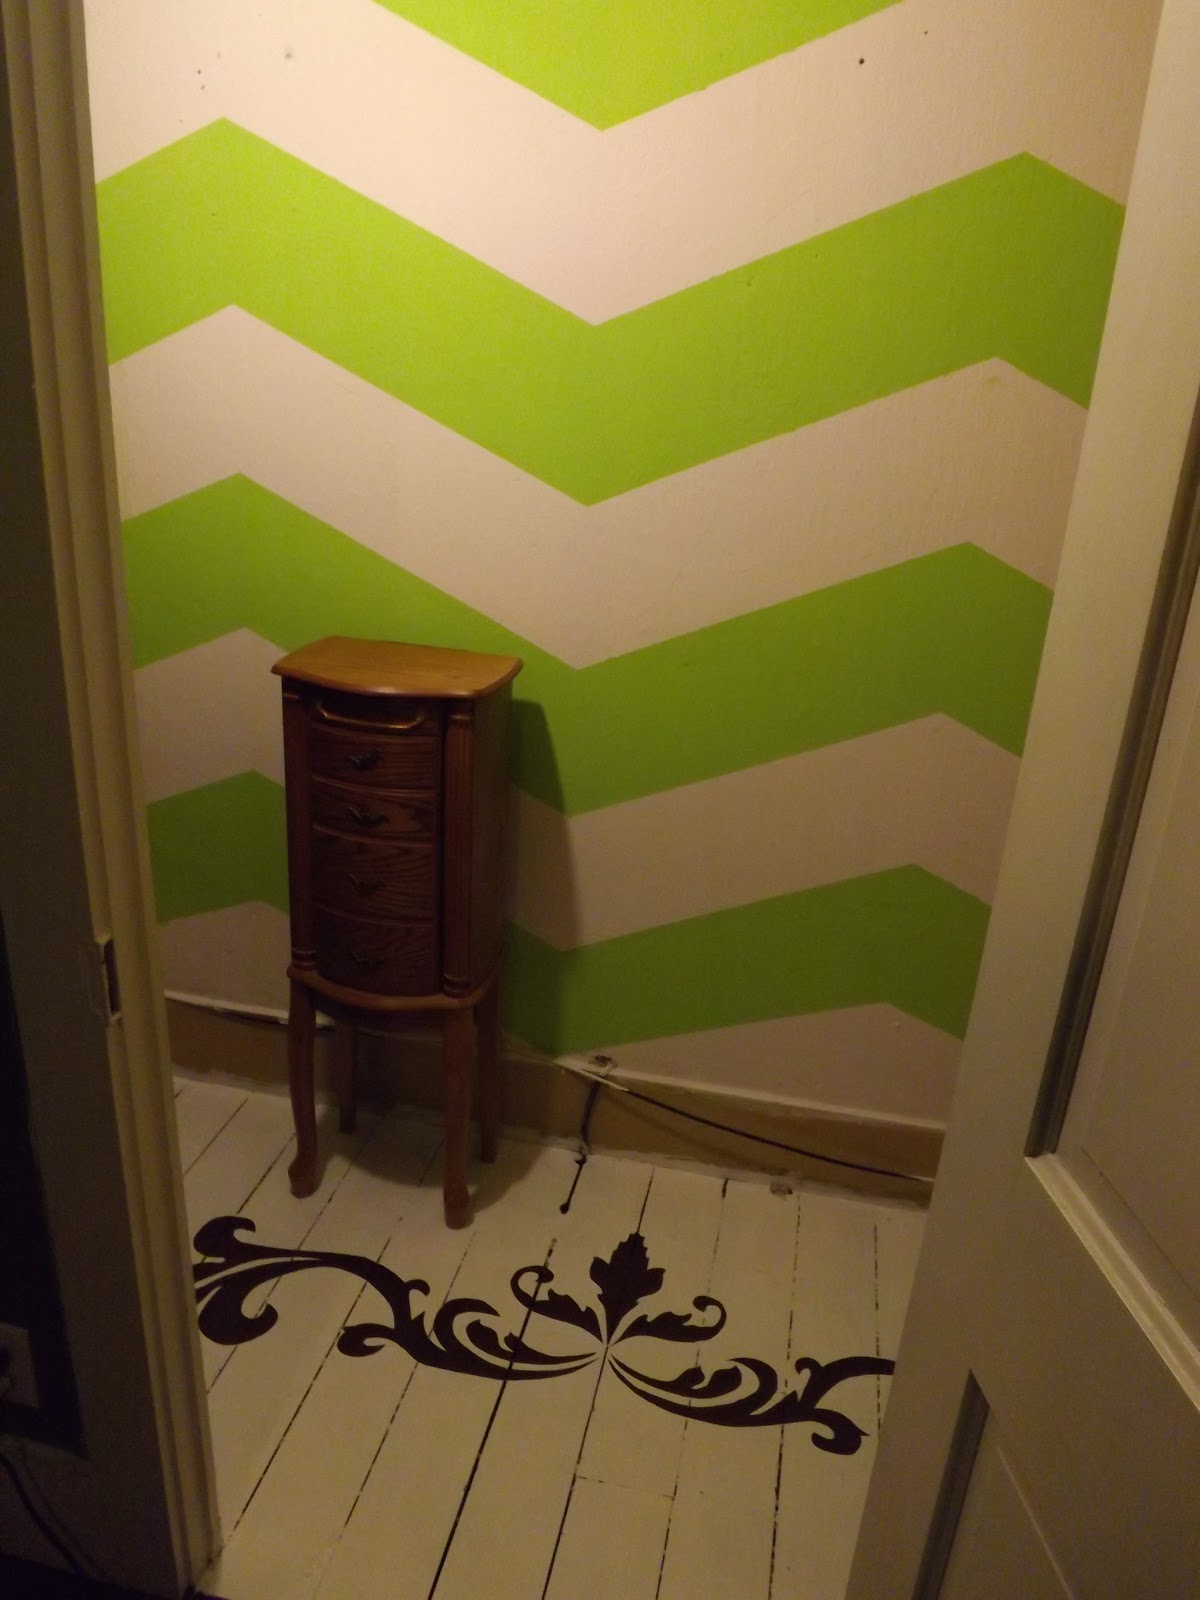
Remember my Chevron Closet Makeover?  Well the last thing to finish in there was the floor.  I wanted to do something fun, cheap and pretty.  So I set out to find a great big stencil for the floor!

...unfortunately I found nothing even close to what I had envisioned, nothing close to big enough and nothing in my price range even if I had liked something.  Now what?

If you're one of my Facebook friends you may remember a post a couple weeks ago about the best ever $15 find, an overhead projector!  I got a few comments from friends about why on earth I would need such a thing and telling me this was another unneeded item to add to my "hoard".  :)  What hoard??? 

As it turns out there were hundreds of clip art images to choose from for my floor design.  Here's what I ended up with:


I printed it off and traced it with a Sharpie onto a clear sheet protector I had laying around.   Evan and I work next to a printing company and last summer we were told some large rolls of vinyl were being thrown out.  So after work we headed to the dumpster to find this: 
 
Indeed a HUGE brand new roll of sticky white vinyl.  Evan was even on board with this pick!
 
So I taped a 5 foot section to the wall and turned on my projector.

 
I traced the image then cut it out.
 
 
I had previously painted the floor brown where my vinyl floor stencil would go.  Then I peeled off the backing and stuck 'er down.


After that I painted the entire floor white right over the vinyl.  I had to give it two coats to get the coverage I wanted.
 
 
While the paint was still wet I began peeling up the sticky vinyl.  In hindsight, I should have let the brown paint underneath dry over night but I was so excited I only waited a few hours.  Because of this the vinyl peeled up a small amount of the brown paint in spots.  Note taken.
 
 
Needless to say I had to touch up a few spots with a small brush. 
Here it is all finished.  I'm pretty excited about how it turned out, it's exactly what I wanted!


So what do you think?  Yay or nay? 


Monday, January 21, 2013

Chevron Closet Makeover

Today I'm sharing my Sunday afternoon project with you all! 

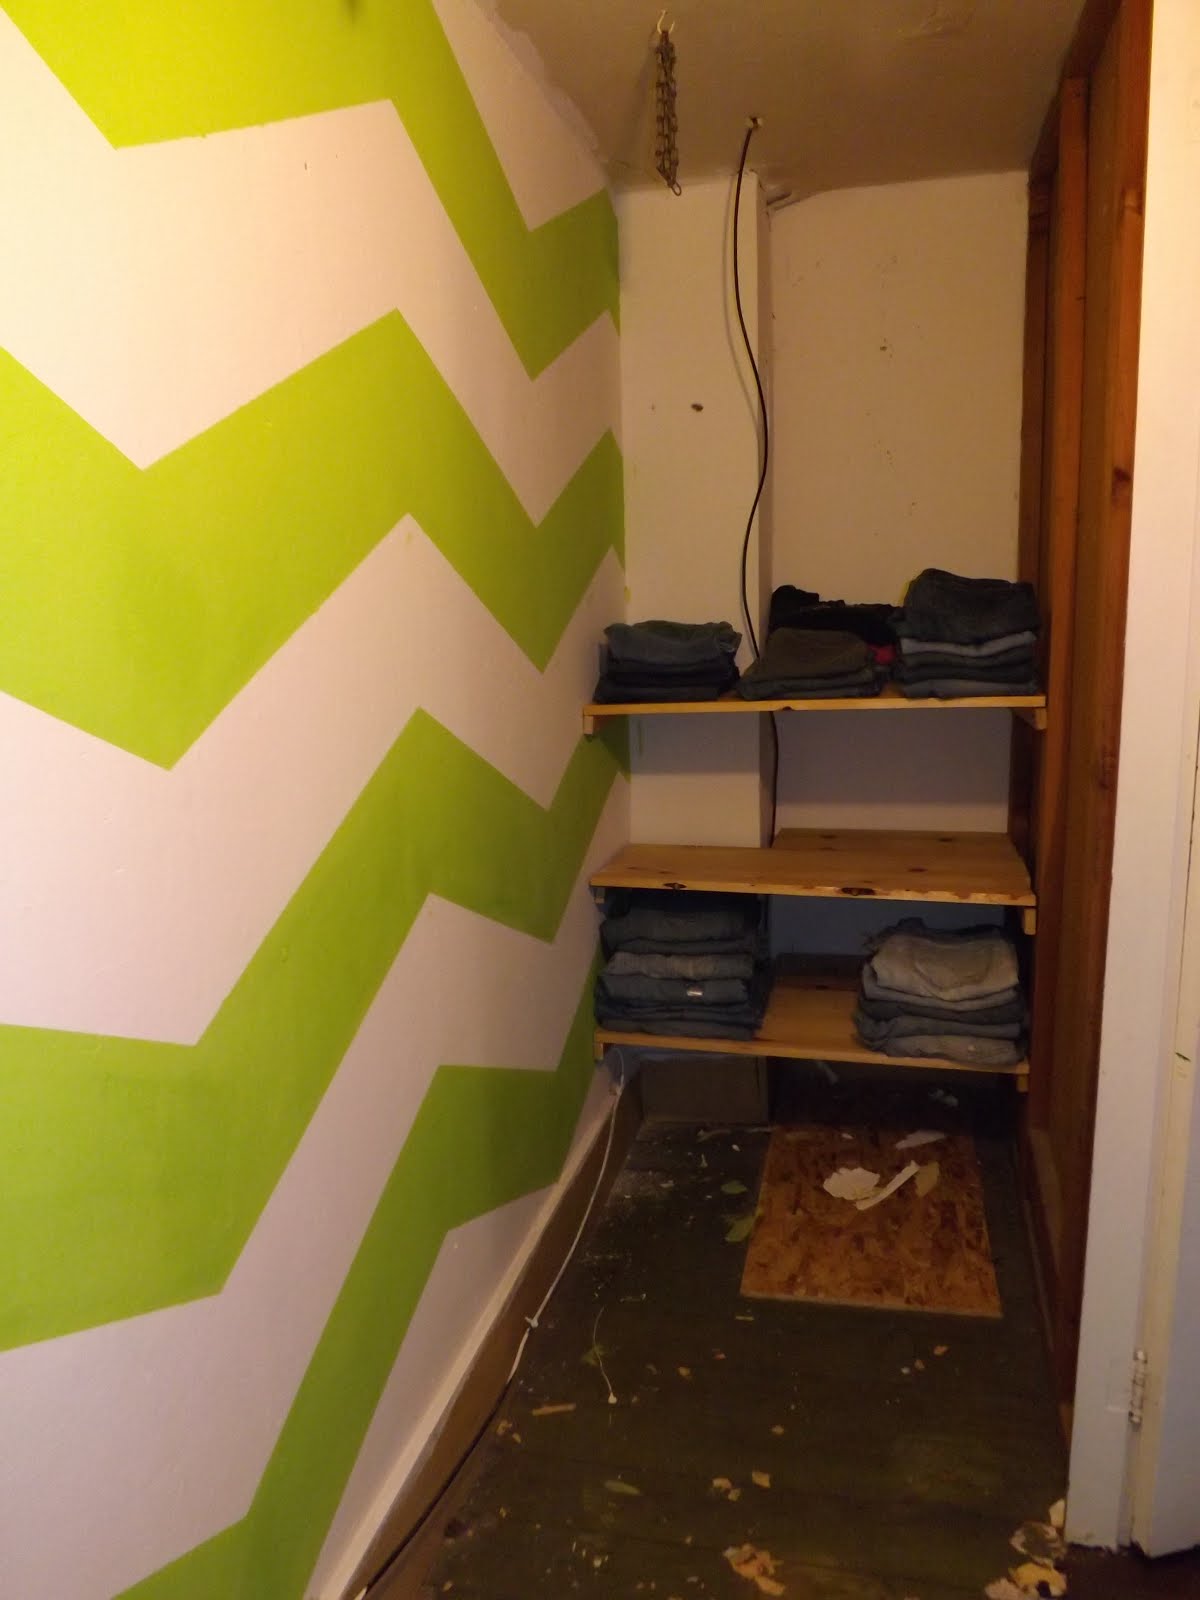
I've been wanting to give our bedroom closet a makeover since we moved into our new house in October.  Here's the deal:  This closet is HUGE compared to what we've had in the past and when I first saw it I thought we would have more space than I knew what to do with.  These pictures were taken after my hubby removed all of the contents so it looks pretty bare.  Rest assured that this long, skinny closet has such a bad layout that it did not function for us. So lets look at the start...


On this end were three wooden shelves which we actually reused in the final product.  They were deep and great for storing folded clothes.  As you can see there is a bracket for a clothes rod in the middle of the wall.  We actually installed this because there was no hanging storage what so ever.  BUT-once we got clothes on there we had about 4 inches between the clothes and the outer wall.  It wasn't very ideal for getting in and out or trying to SEE anything.  Basically upon entering the closet you got a face full of clothes!
 
Ahh yes, the other side.  There are so many problems here it is overwhelming.  To start, this room did have carpet but we pulled it up expecting the same wood floors in the bedroom that I figured I would eventually paint.  See that big piece of plywood?  Well if you lift it up there is actually a gaping 8" hole underneath that looks like it used to encase duct work of some sort.  So the plywood stays until we figure out a solution. 
 
 
On the left hand side is the chimney, it's a problem throughout multiple rooms in the house.  :/  Plus there was severe damage to the plaster which the former owners covered with duct tape?? Yep. 
 
 
The wall paper was pealing and there's random cable cords running around.  Plus there were tin can lids covering other holes in the floor.  I never knew this used to be the standard way to fix them.  Kinda cool :)


So I stripped the wallpaper...both layers. 
 
(insert more duct tape patch jobs) 


and gave the room a clean coat of white paint.

Evan hung our new closet rods on what used to be the shelf end.
 
 
Then hung the shelves on the other end.  He had to cut out a corner so they'd fit in around the awkward chimney. 
 
 
Then I taped for my beautiful Chevron Stripes!


After that I headed out to the garage where my love had cut an 8 foot section of crown moulding into four 2 foot sections.  I had purchased some spray paint earlier in the week in a sweet bright green.


I sprayed up my 4 sections with two solid coats and they were looking fantastic. 


While these dried outside I went to work painting my Chevron.  I had eyeballed the green color when I bought paint and it is literally the exact same.  Turns out I have a pretty accurate eye! :)


I bet you're wondering what I have planned for that crown aren't you?  Let's just say shoe storage has been a problem for a long time in my closet.  In the past I have used this thing which is adjustable but it sits on the floor which isn't ideal.  I always stub my toe on it.


After seeing a picture on Pinterest I decided to go ahead with the crown idea.  It works wonderfully.  :)


If you're wondering what the brown stuff is, its a thick denim like fabric I had on hand from our apartment.  It used to hand in the basement on the unfinished ceiling (to cut down on the cobwebs and make it look more finished).  The wall its on now in the closet wasn't finished and drywall wasn't really in our budget or timeline for this project.  I just used some upholstery tacks and pinned it up.  I think it gives the room a sort of soft feel, It's pretty neat looking in person I promise.
 
Look how great these shelves work out for my ever growing shoe collection!  Plus, there's room on the other side for more as it continues...muah ha ha!


Isn't it neat how they hang right on there by the heels? 


Of course this room isn't quite done yet.  I still need to do something about the trim, it's right where it started in 100 year old crusty tan.  The floor needs some help too but I haven't made a final decision on where to go with it.  I'm contemplating super high gloss white.  Yes? 
 
I have to say I'm really happy with the progress I made on what should have been a lazy Sunday afternoon.  A place for everything and everything in its place.  That's what we've been trying to implement around here. 


This is a good start.  :)
DIY Show Off

Friday, November 16, 2012

Hand Painted Wood Floor

The Sanctuary

Hi friends!  Im so excited to start a blog I could squeal...seriously.  My husband Evan and I got married this June and are so happy to be officially moved into our first home.  I have a 5 yr old daughter Taylor and we also recently added a new member to the family...
                                                                          
                                                           Lily

Isn't she SOOOO cute?  We think so too.

Now down to business.  For my first blog post im going to show you the changes we've made in our new homes sanctuary (aka-the bedroom). 

When we moved in it looked like this:


Yes, that is maroon and tan (very filthy tan) paint and green carpet.  It also had this terrible green and maroon and gold wallpaper boarder.  Clearly it was the first thing to go since you dont see it in the above photos!


After I pulled up the carpet I found very dirty, worn and staple infested plank wood flooring.  Not the kind of flooring you can refinish, the old sub-floor kind.  Thankfully my wonderful friend Becky helped me pull out each and every one.  We were blessed to have her little girl Nevaeh there to help supervise.   It was painted with layers of green, orange, brown and white paint.


I set out to make it look beautiful and well, more me.  (oops I mean US!)  I loved the color we had in our apartment and I already had all of the accessories to match as well as a chair I recently reupholstered so paint was easy.  The color is called Turquoise Jewel.  Since I'm all about deals I purchased some white paint off of craigslist for $3 a gallon.  Since our local Menards does color tinting for free I marched in there to have mine mixed. 

To my surprise you cant just mix ANY color from a gallon of ANY white paint.  We had to improvise a little bit and the poor young man behind the counter ended up pulling fist fulls of paint out before mixing to *hopefully* get the right color, or at least one close.  It took some adding, and some subtracting of paint but after 3 tries we got one I was happy with.  Needless to say this is definitely a custom color that cannot be re-created.  He was sure to tell me my 1 gallon was all I was going to have.  Thankfully it was enough. 

A few weeks before we moved I found this great photo on pinterest and knew right away I would use it on the floor. 

I found a great post a couple days before I started from Brooke at All Things Thrifty.  The woman is a goddess, I swear.  I have learned volumes from her. 

I knew I didn't want such a large pattern on our floor and since our wood wasnt beautiful like it is in the inspiration photo I painted it all brown first.  I used Dutchboy porch and floor paint in Cocoa Bean and the same floor paint in white for the stripes. 

I didnt take photos of the process (boo-I forgot) but basically I just made a simple template out of .99 cent foam board.  I put two coats of my rich brown paint on the floor then I traced the pattern over and over with white crayon.   I went back with a small craft brush and hand painted the pattern on the floor.  I had some help from my friend Jill with this very, very TEDIOUS task. 
                                                           whoo-la!
We absolutely love it.  The we got our furniture moved in.  *Notice my beautiful chair?*  Furniture post, I promise!


 I should really invest in a better camera, or some photography classes.  It might help if the floor was actually clean.  We tore out plaster and lathe down stairs and it was fu not fun.  The dust is EVERYWHERE and I cant rid our house of it.  I was told before we started that I would be cleaning up dust daily for the next 6 months.  True story. 
Thanks for joining me, it's been swell!