Showing posts with label white. Show all posts

Saturday, February 2, 2013

Coffee table converted into an Ottoman

This project has been on my to do list for a long time.  If you remember this post you'll know that I have a coffee table with two end tables I purchased off of craigslist for only $25!  I remade the tables into something I love But I needed to bring out some beauty in the coffee table too. 
One thing I don't like about our new living room is that there isn't room for 2 to lay on the couch.  No snuggle time lately, not even for Taylor and I.  It's kind of a bummer.  So I decided there's no time like the present to finally convert the junk catcher (aka coffee table). 
First thing I did, just like the tables, was to sand and paint in white. 


The whole thing doesn't need painted because you wont see the top anyways.  I've been looking for fabric for this project for a long time but everything I've found, that I like anyways, is expensive.  Like $60/yd expensive.   Here's what I was originally thinking of-something similar to this:

https://blogger.googleusercontent.com/img/b/R29vZ2xl/AVvXsEhlw88Z0TstGDXS6gxL8kswub1droC_6Xh50tS1TW0awI43fNj0WcYH4KKiNNHCZ0Vs165-odlCjIFCQcSY9ftu9aq-3IcrtnUmVdPgR05d8day6HDkPyDrofQqNbaV-_wUlYc7V2D5iOY/s320/blue+ottoman.jpg
 BUT while buying fabric on Thursday I walked in and was smacked in the face by something I loved! Figuratively smacked of course.  Bonus, it was on sale for $12/yd.


I should probably get to the materials:
-old coffee table
-white Rustolium spray paint
-2 yards beautiful fabric
-4 foot section of 3" foam
-quilters batting
-package of buttons
-thread
-Staple gun
-hammer
-scissors

The first thing you want to do is arrange or measure in my case where your buttons will go.  I marked the spots on my foam with a sharpie.  Then I jabbed a steak knife through in each spot and gave it some twists and turns to create holes.  Next I stacked my foam on top of the table and stuck the sharpie through each hole to mark the spots on the table. 

I drilled through each mark. 


Then I dusted off the table and brought it inside.  I stacked the foam on top and covered it with the quilt batting and then the fabric.


Next I started my tufting.  I used 6 strings of thread for each button.  I could have bought some heavy duty thread but I figured this would work just as well.  Next, I pulled the thread through the fabric, batting, foam and pushed it down through the hole in the table with a paint brush handle.  Innovative, I know.  :)

On the bottom I secured each piece with a staple gun and 3-4 staples.  I had my sister help with this part, she pulled the thread back and forth while I stapled.  There's a name for this technique but it escapes me right now.  Here's how each tuft looks from the underside. 


When I was done with all 8 buttons it looked like this:


Time to secure the sides!  We turned it over and I had Makayla (my lil' sis) help hold the fabric tight while I stapled.  When securing fabric in a project like this you want to staple as follows:


When stapling pull the fabric tight and have someone hold it while you staple at each point.  You'll want to turn it over and check along the way to ensure everything is even and you don't have any spots that are too loose or too tight. 


I usually save the corners for last because they're the hardest.  In this instance I pulled one side tight and stapled it down.  then I wrapped the other side all the way around the corner overlapping the first side and tucked in any extra fabric.  I just pulled the crease straight with my fingers and stapled in place. 

Here's it is in our living room. 


Now I can finally put my feet up!


Thursday, January 31, 2013

DIY Vinyl Floor Stencil

Today I have a fun new project to share with everyone.  I got this pretty lil thing done last weekend but I had a couple spots to touch up.  Between a sick kid and snow days it took me a while to get around to the last (and easiest) step. 

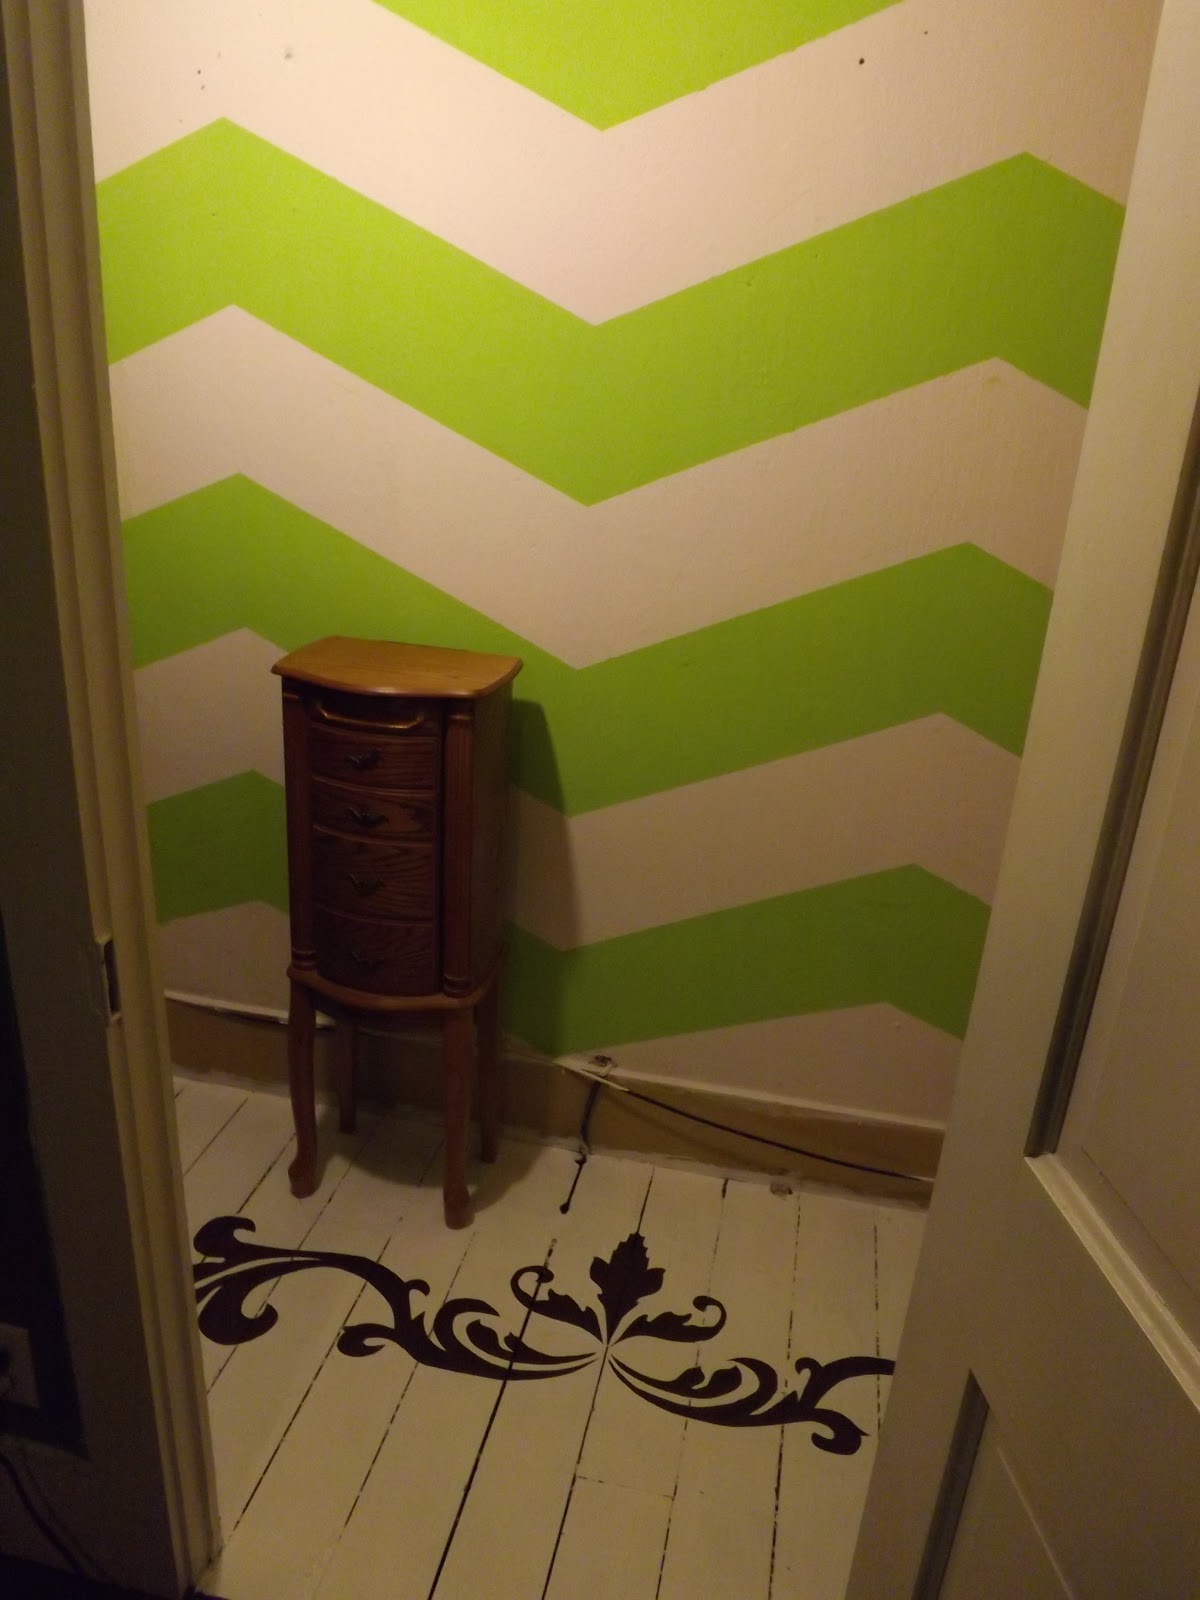
Remember my Chevron Closet Makeover?  Well the last thing to finish in there was the floor.  I wanted to do something fun, cheap and pretty.  So I set out to find a great big stencil for the floor!

...unfortunately I found nothing even close to what I had envisioned, nothing close to big enough and nothing in my price range even if I had liked something.  Now what?

If you're one of my Facebook friends you may remember a post a couple weeks ago about the best ever $15 find, an overhead projector!  I got a few comments from friends about why on earth I would need such a thing and telling me this was another unneeded item to add to my "hoard".  :)  What hoard??? 

As it turns out there were hundreds of clip art images to choose from for my floor design.  Here's what I ended up with:


I printed it off and traced it with a Sharpie onto a clear sheet protector I had laying around.   Evan and I work next to a printing company and last summer we were told some large rolls of vinyl were being thrown out.  So after work we headed to the dumpster to find this: 
 
Indeed a HUGE brand new roll of sticky white vinyl.  Evan was even on board with this pick!
 
So I taped a 5 foot section to the wall and turned on my projector.

 
I traced the image then cut it out.
 
 
I had previously painted the floor brown where my vinyl floor stencil would go.  Then I peeled off the backing and stuck 'er down.


After that I painted the entire floor white right over the vinyl.  I had to give it two coats to get the coverage I wanted.
 
 
While the paint was still wet I began peeling up the sticky vinyl.  In hindsight, I should have let the brown paint underneath dry over night but I was so excited I only waited a few hours.  Because of this the vinyl peeled up a small amount of the brown paint in spots.  Note taken.
 
 
Needless to say I had to touch up a few spots with a small brush. 
Here it is all finished.  I'm pretty excited about how it turned out, it's exactly what I wanted!


So what do you think?  Yay or nay? 


Sunday, January 27, 2013

French Country Side Table on the CHEAP!

I've been on the look out for some new side tables for our bedroom.  I wasn't necessarily looking for matching tables just cute French Country styled.  I came across this baby the other day on craigslist and had to pick it up.  It was close to perfect but when I actually got it I loved it even more!  The post showed the general shape but I had no idea it had such detail.  Check it out:


I was a little disappointed that the table is actually plastic, not wood, but for my purposes it would serve just as well. 
 
I gave it three coats of Rustolium 2x white spray paint in between other projects and brought it in.   I set her up in our bedroom and she looks great!  Exactly what I had been looking for. 


I love being able to use my design creativity on the CHEAP!  Here's the break down:
 

My Table:                                                                                Inspiration Table:
-$6 table on craigslist                                                               -$610 via The Well Appointed House
-$3.44 Rustolium spray paint


How's that for getting just as much bang for your buck?  It just goes to show that anyone can have the great look they want without paying an arm and a leg for it.  You just have to take the time to look around a bit!
 
Thanks for reading,
Aleasha